14th June 2018
A week in which we take 3 steps backwards, but 7 steps forwards, and finally another step backwards.
351 days to go
 |
| Broken windscreen pin |
The last week or so has been hectic - Or perhaps I should say "more hectic than usual" ? I had lent my 4WD Troopcarrier camper to some Welsh friends who have spent the last 75 days driving round Australia, and they arrived back with us last week. While I am sure they would
have liked a rest, I
put Bernard to work in the garage with me, so he had a busy last few days in Australia !
 |
| Old vs broken vs new |
First of all I was dealing with the windscreen, and in trying to just snug up one of the windscreen pins so it would never come undone again, it sheared off, leaving half the thread in the hole !! Couldn't believe it - Just when everything on the windscreen was finished, I had to go and get someone to help me remove the stub as my eazyouts wouldn't get it. Looking at the pins I have, the new ones (which is what broke) have a really narrow neck, which must be made out of cheesium or similar, as it is very soft. The original ones which we had replaced have a much shorter thread section, and no "neck" made out of cheesium - Seems like the old style is better !
 |
| Making up new clips |
 |
| Made vs bought |
Then there were the springs that hold the windscreen in place when it is
lowered into its "racing" position. These have a little metal eye piece which clips over a pin to hold it in place - But the eye piece has no finger hold so is almost impossible to hold and pull the spring with one's fingers, especially if they are arthritic like mine ! So I got some alloy and made up a couple of units with a curved end which makes pulling them into position so much easier.
 |
| Original vs new lens |
 |
| Original vs new light housing |
Last week we found the front side lights were fouling the front
tyres, so we had ordered some units off a later Healey which protrude more out front with the glass, but are correspondingly shorter on the back side. Once these were fitted, no more issues with the tyre rubbing on the wiring - Its close, but not rubbing.
 |
| New wing mirrors |
A parcel arrived this week from the UK with our new and larger wing mirrors. The only wing mirror on our car was on the pax LH side, and was American, and didn't really work too well, so Ashton had ordered these larger units from the UK, and they will work well, as well as having a large enough base to cover all the many holes made by people fitting all sorts of different mirrors !
 |
| Spring on wiper |
Once we had the broken windscreen pin removed and replaced, we were able to work on the wipers. When first fitted, they hardly touched the windscreen, let alone with enough pressure to remove any rain drops. Basically they just flopped from side to side ! We looked at ordering new arms, and also tried to buy some modern ones locally without luck, and finally Ashton hit on the idea of somehow increasing the pressure on the screen by adding a spring that pulled the arm inwards. Bernard made up a small bracket that fitted on the spindle and increased the angle of the spring, and once we had a trial fitting, we found it worked really well. Drilling the wiper arms was difficult due to it being hardened steel, so a few drill bits were sacrificed before we finished the holes !
 |
| Double sided tape on trim |
We have some airducting in the car, but not much - - And no heater !
 |
| Trim in place |
However on the dash are two plates of trim which make the slots in the dash look more "finished", even if there is no ducting through them ! Previously this trim was held in by small and very fiddly clips which had to be fitted under the (already crowded) dashboard, which also made them very difficult to remove if one wanted to remove the front shroud again. So I defaulted to the old favourite - Double sided tape ! Hopefully this will keep them firmly in place.
 |
| Idea for spare wheel strap |
Last week I took a day off from working on the car to drive up to Brisbane to visit the Camping & Caravan Show. While I saw some very interesting vehicles, and got a number of new ideas for my camping expeditions, one item I saw looked brilliant for Gidget. We intend to strap our spare tyre (not the spare wheel - That goes inside the boot) onto the luggage rack, and we need a good strapping system to hold it in place. One offroad caravan had the spare wheel strapped to a rack using tie downs that had a central hoop so that the load was equally spread as you tightened the belts. I thought it was really neat, and the stall holder happily told me where they sourced their straps, which are specially made for them. Will be working on this item as soon as I can get the car running properly !
 |
| Rear boot rack |
With the top end of our Healey bootrack bolted to the boot hinges, it had a weird system whereby the weight at the lower end was taken by two arms that just rest on the rear bumper - This system would not have worked on the bumpy roads we expect to encounter, so we sourced a couple of quality suction pads from a
 |
| Suction pads on boot rack |
camera mount firm, and then Andrew made us up some brackets to connect the existing tabs to the suction units. Due to the odd twisted shape of the boot (after its previous accident damage), Bernard and I had to bend the boot rack to match the shape of the boot so that it would sit "flat" on the boot lid, and to do this we had to wedge one corner of the rack under the car's front wheel to pin it down, then support the rack bars on wooden blocks, before I bounced with all my weight on the opposite corner ! That is one strong boot rack !! Eventually after 3 attempts, each more brutal
 |
| Bending the boot rack to fit boot |
than the last, the rack sat properly on the boot. Additionally we felt that having the upper rack mounts bolted through the existing hinges might place too much stress on the hinges, so I made up a small bracket out of alloy (easier for me to work with) as I usually do for thiese things, and then took that down to Andrew in his machine shop for him make in steel. We then trial fitted one of the original smaller wheels on the rack, and determined that the tyre will need to be mounted quite a long way backwards if we are to have sufficient clearance at the top of tyre to enable us to open the boot lid - And we need to do that frequently when we are filling the fuel tanks, whose caps are inside the boot ! The mounting of this spare tyre will need a little more analysis for it to be satisfactory.
 |
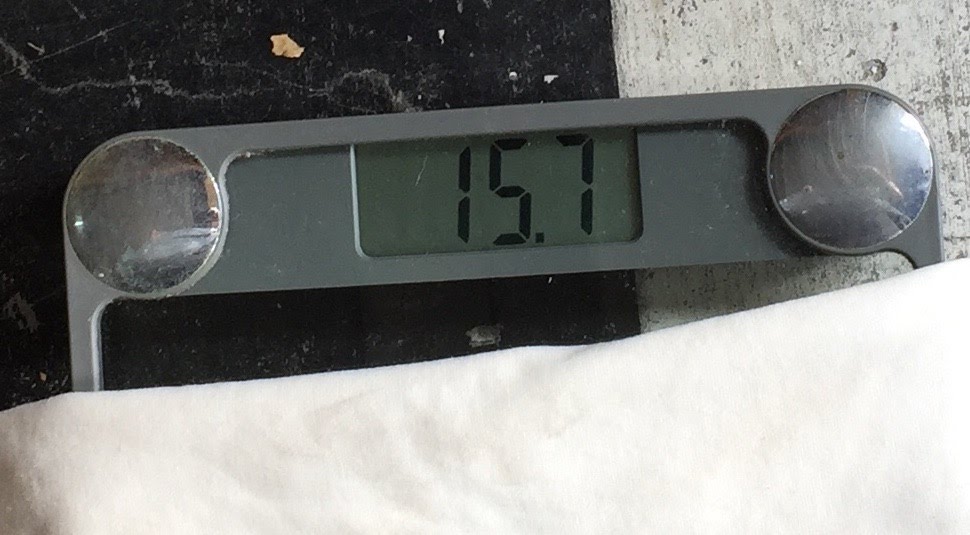
| Weighing the skid plate |
Next job was to remove the new skid plate in order to access some of the other items we still needed to finish underneath. It came off easily enough even though I was having to squeeze
 |
| Sump shield on skid plate |
under the car to undo the bolts - All I will say is that when the last bolt on a big plate is undone, you need to make sure your hand (or any other body part) is not underneath it ! I then put the skid plate on the scales - 15.7 kg !! There is also a 55 mm high plate across the skid plate that has been fitted directly in front of the engine sump in an effort to prevent stones etc from getting between the sump and the skid plate. We will also fit some foam under the sump in order to keep stones out.
 |
| Wheel alignment at Action Tyres |
Next morning it was off to Action Tyres & More in Southport to see my tyre friend, Matt Kingsley. He has supplied my tyres and done my suspension setting work on all my vehicles for many years, and is currently supplying the Yokohama Gelolandar tyres for the Healey. I got there by 7.30 am before they got busy so they could focus on our car, and after a quick drive to check it out, Gidget was on the hoist and all the wheel alignment equipment was mounted on her wheels. A check on the computer screen showed a tow in measurement of 19.9 mm, which is enormous ! On most modern cars you can adjust toe on individual wheels, but the Healey only has a single central adjustment bar so one can only adjust the two wheels together. Because the toe is easier to adjust than the camber and caster, we decided to set that first. Some quick turns of the centre rod saw the toe in come down to + 0.1 mm on the left, and 0.0 on the left - Which is almost spot on. The factory setting is +1.6 to 3 mm
 |
| Alignment in progress |
total. We then looked at the camber, for which the factory setting is 1 degree, and that was now 0.4 deg on the left, and 0.6 deg on the right. Although the camber is adjustable, it is NOT easy to do, especially now all the front panels and ducting is in place, so it was decided that this was a very acceptable setting, and to be that close after new upper suspension mounts had been welded in place is a credit to Andrew and Steve who managed to calculate the position of the new mounts so accurately. Finally, the factory castor angle is 1 3/4 deg, and the reading for ours was 2.3 deg on the left and 1.3 deg on the right - Again, amazingly close for a car that has been so bashed and pulled around and straightened again ! And as castor is kind of hard to adjust without major suspension work, it was left at those settings. That left the toe in, and it was decided to leave it at the stated settings for now, until the car could be driven more and the suspension allowed to settle - It can easily be set to 1.6 - 3 mm later.
And the rear suspension was as amazing - Total toe of -0.4 mm, and camber of 0.7 deg on either side, and basically the solid rear axle was absolutely true and straight. I was happy with the results.
While driving home, I was reminded yet again that the car was jumping out of 5th gear when under load - NOT GOOD ! I spoke with Steve at Classic Car and we agreed that the following Monday he would be able to work on the car and get the gearbox out so I could take it back to Nerang Gearbox & Differential for them to work on it - Yet again ! Grrrrr. If you remember, the original issue was that the gearbox was jumping out of 5th, and we had already taken the gearbox back to them once when after the first rebuild it wouldn't change gear at all, so this was the 3rd time - Not good.
Over the weekend Bernard and I continued to work on other aspects of the
 |
| Trying out the spotlights |
car. The front spring / bumper arrangement needed a new design since our original pieces no longer fitted the end shape of the front bodywork. Using the original bumper brackets, we worked out the location for the two spotlights, and also pins so we can mount the spring, and also worked out a way to mount a tow bracket in there, and prepared the entire mock up to hand to Andrew for construction. We also made sure that the front of the spring was far enough forwards (when viewed from above) so that the bodywork and headlights would actually be protected in any minor accident.
 |
| New brake fluid reservoir fitted |
An earlier disaster was that the original brake fluid reservoir that I had thought was in good condition in fact turned out to have a small leak, and a dribble of brake fluid had run down the inside of the engine bay, bubbling the paint as it went, and ruining our previously pristine engine bay. We had ordered a new reservoir and I now fitted it, after carefully removing all the fluid from the existing reservoir with a syringe. Once all renewed, it appears that the leak has now been fixed - Albeit too late to save our paint.
Last week we found the bonnet fouled the new radiator and wouldn't shut properly, so we decided to
 |
| Bonnet stay fitted to boot |
have it totally removable rather than hinged. This meant that the bonnet stay was no longer required, and since the previous boot stay no longer fitted due to all the fuel pumps etc, we worked out a way to now use the bonnet stay as a boot stay instead. With a billiard cue spring clip to hold the stay when closed, and a short length of hose to provide a firm slot for the stay when the boot is open, it all worked perfectly. We also cut, fitted, and painted an old broom handle to fit on the other side of the boot in case additional support is needed when the spare tyre is mounted.
Time to look at storage of parts. Many of the small and more fragile parts will need to be stored in plastic boxes, and to find suitably sized boxes I set of to Howard's Storage. Luckily they were having a sale and we found some great boxes at 1/2 price, so took a few home to start experimenting.
 |
| Working on boot storage options |
This will be an ongoing process over the coming weeks that we will refine as we go, but the boxes we now have look like a great starting point. I made up a bracket that will fit over the boxes to keep them stacked together, and then a tie down strap will keep the boxes in places over the roughest roads. We also looked in Supercheap and found some other boxes there which would be suitable - It all comes down to measurements in the end, and whether they fit well in the boot. We also purchased some non slip matting to put under the carpet that sits on the fuel tank, to stop it slipping from side to side.
And thinking of oils and other fluids in the deep well at the side of the boot - Just got to find a way to stop them jumping around on bumpy roads.
 |
| Gearbox delivered for repair |
On Monday it was time to take the car back over to Classic Car Clinic to resolve the gearbox issue, and also for Steve to look at some of the tuning issues, resetting tappets etc. We fitted the smaller original wheels for the drive so there was no rubbing on the guards, and had a great drive over there in the morning sunshine - This car is starting to grow on me as it really is great to drive. By the following morning Steve had the gearbox out so I ran that over to the gearbox place, and Steve started to work his way through a thorough check on the car from front to rear, as well as fitting the Monit and Rally Safe units which we need so we don't get lost !
 |
| Fuel leak from around fuel tank sender |
Over the past couple of weeks there seemed to be a strong smell of petrol in the boot which we put down to the car just being "old". However,, in trying to find out why the fuel guage wasn't working, Steve removed the auxilliary tank so he could get to the sender unit that is hidden in the top of the original tank - And found a pool of fuel sitting in the recess around the sender unit - The whole thing was leaking now that the fuel tank was full ! If you remember, we had a major issue when fitting the sender unit due to misaligned bolt holes, and it seems there were more issues inolved in that unit. Steve used plenty of gasket compound to seal the unit, and we left it over night to cure. When the tank was refilled - No leak 😀
 |
| Monit sensor fitted |
The Monit works off GPS, but for times when there is no GPS signal, it is necessary to fit a mechanical sensor that can read wheel rotations and calculate distance so that calculation errors are not made. On a modern wheel this can be mounted near disc brakes as there is more open space, but the drum brake is fully enclosed and it is impossible to find anywhere to fit it - The sensor has to be within 2 mm of a rotating part. In the end, the only solution we could find was to drill a hole it the brake backing plate and insert the sensor so it read off the backs of the 4 studs to which the drum itself is bolted. To get in there required the dismantling of the entire front hub assembly, but in the end, the sensor was mounted correctly. We then tested it on the Monit, and it was working, so we then put the front hub back together.
 |
| Tow strap fitting |
I was working down at the back of the car, taking the opportunity of working under the car while it was on a hoist - a luxury that saves me rolling about on the floor. I managed to find a place on the rear chassis where we can fit two tow straps - There isn't a lot
 |
| New bump stop |
of room left for anything, especially once the skid plate is bolted on. And after jacking up the rear axle to take the weight, we loosened off the rear axle U clamps and inserted the new conical lower bump stops which are held in place by the clamps. Because we changed the axle, we have subsequently found that we also have to change the rear bump stop system, and these lower stops are part of that. We have also been advised to re-inforce the upper bump stops, so this is currently being done.
 |
| Cutting front guard |
Meanwhile Andrew came over, and after marking it all up, got his cutting wheel out and took a sliver out of the front guard in order to eliminate the tyre rubbing. This is going to require some slight body filling and repainting, but that is not too difficult - We will
 |
| Sliver cut out of guard |
probably have some other places that need touching up by the time we have finished, so we will leave this until later. It is fascinating to watch him at work on the bodywork - Cutting a sliver out so the wired edges of the wheel arch can remain in place and be pulled back along the edge and welded in place. Very clever.
I picked up the gearbox after two days, and we hoped that all was well. They said there was no obvious fault, so it was possibly just general wear, and since the box is some 45 or more years old itself (5 speed early Celica box) this is possible. To hopefully resolve the problem they had therefore fitted new 5th gears and hoped this would work. Steve managed to get the gearbox back in by the time I got to the workshop, and then we started refitting all the interior. Once the switches were all in, we started the engine and ran it against the hand brake to try to similate load on the box - And it didn't jump out of 5th !! We will find out for sure once we get the car on the road tomorrow.
 |
| Monit & oil temp gauge mounted |
With the switches in, we installed the Monit using the template I had prepared last night, and wired it up. With that connected, we then installed the wiring for the Rally Safe unit that will be provided for the COT Rally in August in Alice Springs, but which we will not be required to fit for the P2P. We also relocated the oil temperature guage over to the LH side of the dashboard - Its previous position under the dash was proving just too troublesome. Unfortunately to do this we had to remove the sensor in the sump, which meant we had to dump all the oil out of the engine. Since this has only done 26 miles, we saved this in a clean container, and re-used it to
 |
| Engine bay light fitted |
refill the engine once the sensor was refitted in the sump. We also fitted a new oil seal in the tacho drive - The original seal was shot and leaking quite badly, and we had to order one out of Perth, which arrived this morning. An oil leak was also found under the distributor, so this was fixed by making a gasket in order to seal the base of the distributor. We also fitted the interior light in the engine bay - Originally this was planned to be fitted on the bonnet so it shone down onto the engine, but now the bonnet is removable, this isn't possible. So we fitted it on the firewall, and if it doesn't light up the engine bay enough, we will have to use our torches.
While we are waiting on Andrew to bring back the front bumper brackets, we re-fitted the driver's seat, and once those bolts were in place, we fitted the base for the RH under floor storage unit. Since this will hopefully be the last time we have to touch these, we applied a bead of silicone all the way around the plate which will hopefully make the boxes quite waterproof, and tightened them up.
 |
| Roof in place |
After that, we took the roof, and for the first time, fitted it to the
 |
| Fitting up the roof |
car. The front rubber had to be reglued, and after that was done, we used long lengths or wood to prop the roof up in its correct position so we could adapt the mounting points so we can easily fit the roof even when we have a roll bar fitted. The roof itself is actually in quite good condition, and should be fine for the trip. Like any old British sports car, the roof will never be waterproof, especially around the sides, but hopefully in any major storms it will keep the worst of the rain at bay. We just have to work out how we are going to mount it.
 |
| Rear grease nipple fitted |
 |
| On the weigh scales |
We still had a few minor bits to do - Extended grease nipples into the rear spring hangers, which required some cutting and grinding to enable them to be fitted, but are finally in and full of grease. Where we had welded in 1" tubing to strengthen the rear panels to
support the spare wheel, the
open ended tubes were a bit ugly and ripe for corrosion, so I installed plastic end caps to close off the tubing to the elements. We then got the car up onto weigh scales, and after spending some time trying to work out how to operate them, finally came up with the corner weights as follows :-
 |
| Corner & total weights |
FL - 250.5 kg. FR - 249.5 kg, so just 1 kg difference between the front wheels.
RL - 271 kg. RR - 259.5 kg, so 11.5 kg difference, which once the battery is accounted for, makes the rear weights very similar as well. So very even corner weighting, all things considered.
A total weight of 1030 kg, with a full tank of fuel, but with the 15.7 kg skidplate still to be added, so 1046 kg total. This compares with the original factory weight of 987 kg, although this is not specified whether it is wet or dry.
 |
| Top of gearbox removed |
Once all was done, Steve took the car out to check out the gearbox. 2.6 kms later (detail courtesy of the now operating Monit !), he was back with a big grin on his face - All good !!
 |
| Torn gearbox seal |
However, Gidget had one last card to play before the weekend. When we moved the car 5 minutes later, we discovered a small dribble of oil on the garage floor ! Initial fears were that a gearbox seal was leaking, which would have meant removing all the interior yet again in order to get the gearbox out. However,
we eventually determined that the oil leak was coming from the top of the 'box, and once we had the interior apart again, we found it was a rubber seal on the top which has been overtightened by the gearbox people, and had subsequently split, allowing oil to flow out. This rubber seal was brand new - I had purchased it and fitted it prior to the recent rebuild by the gearbox place. Is this gearbox saga never to end ???
The rubber used in the seal is a kind of Viton or Buna N rubber which is not damaged by exposure to oil, and this rubber is surprisingly hard to find. After a number of phone calls we finally located some in Sydney, and they are being couriered to us overnight.
The car is complete and ready to roll - Once we have this gearbox issue sorted..............


No comments:
Post a Comment
Ashton & Giles welcome any visitors, support, and comments as we prepare for our Adventure !